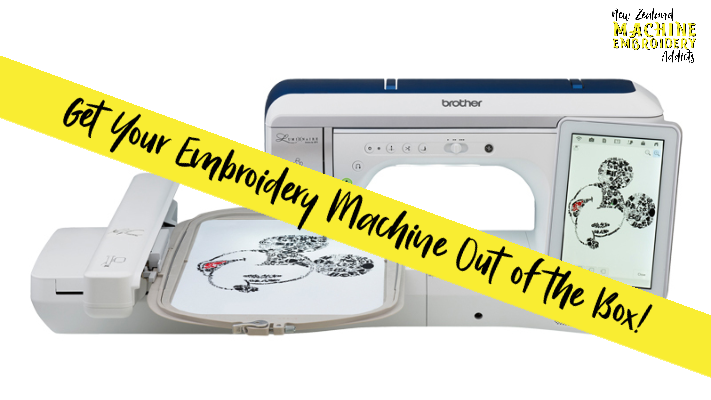
If you’re here it’s probably because you’re procrastinating taking your new embroidery machine out of the box – if you’ve chatted to me at any point you’ll know that I’m on a mission to get machines out of boxes so you’ve come to the right place!!
It would be almost impossible to give step by step instructions for every kind of embroidery machine or craft cutting machine but here is some moral support to get you started – sometimes that’s the hardest part!
Here’s some help to get you started!
Unbox Your Embroidery Machine
Get that box out of the way – having it stare at you from the corner of the room can be daunting! Embroidery machine boxes tend to be pretty huge because of all the padding to protect our precious goods which can make it seem a bit scarier.
If you want to have a giggle, check out my one-handed unboxing of the Brother VE2300 and the Brother Stellaire XJ1 – I very much recommend doing this with two hands!!
Look for a “Getting Started Guide”
Most embroidery machines come with some kind of QuickStart or getting started guide which can be helpful just to get you going and find all the right buttons etc. Have a look through it but don’t worry if everything doesn’t make sense yet, it will be useful when you’re at the machine and working through it step by step!
Basic Tips to Get You Started
If you’re a seasoned machine embroiderer just getting the hang of a new machine, then feel free to skip this bit.
If this is your first EVER embroidery machine – YAY! You’re about to embark on a really fun, creative adventure. There is a learning curve with embroidery and I’m not sure we ever really stop learning but here are some practical tips to get you started with your first project:
- Embroidery thread is different to sewing thread and the designs are created with this in mind so you can’t use any old thread you have on hand for embroidery. You do need to use Embroidery Thread
- Likewise with bobbin thread, it tends to be a different weight to regular thread which is important for maintaining good tension. Unlike with sewing where you change your bobbin to match your top thread often, machine embroiderers tend to just use black and/or white bobbin thread for most projects unless you’re working on a project where the back of the embroidery will be visible (for example Free Standing Lace (FSL)).
You might have received some bobbin thread with your machine – I know most Brother embroidery machines usually come with a spool and some loose bobbins and Echidna will often include some prewound bobbins with embroidery machine value add packages. Check those out before you head out to the shops to buy some!
- Stabilizer! You’re about to stab your fabric thousands of times with a needle (that sounded more violent than I intended! haha) and the thread is going to put a decent amount of strain on it so it needs HELP! There are a few instances where you don’t use stabilizer or various kinds for different purposes but to keep things simple here – cut away and tear away stabilizers are your new best friends! In really simple terms, the more stitches your design has, the more help your fabric will need. This is a bit like baking a cake at times, it’s all about finding the right mix of ingredients but for most common fabrics with a pocket size design (around 10x10cm), cut away or tear away will be perfect!
- Embroidery needles are a must! Again you’ve probably received some with your new machine to get you started. The most common size I personally use is a 75/11. The sizes are written on the needles in teeny tiny writing so grab out your Echidna Sewing magnifying ruler to help you if you have one (or my mum’s hack of using her phone to take a photo then zooming in).
- Use the right bobbin case. If you’ve purchased an embroidery only machine then this won’t apply to you but if you’ve purchased a Brother sewing and embroidery combination machine, you’ll more than likely have a spare bobbin case in your kit. You may think it’s just there as a spare but as a bunch of us learnt from Gary Walker at the NZMEA End of Year function in November 2018, one bobbin case is for sewing and one is for embroidery! Mind blown!
Why do you need two? For sewing you don’t generally need to adjust your bobbin tension but for embroidery you do. So you can have both set at the settings you need to swap them out easily when you need to switch functions on your machine. The one with the little green blob (this is a technical term haha) is the one for sewing.
Make an easy first project
We all have big dreams of the things we want to create with our machines and yes that is why we bought them BUT there is a learning curve to learning machine embroidery and learning a new embroidery machine so start slow to get into the swing of things.
Jumping into a big project on the first go and having something go wrong can be really disappointing so opt for a small, quick win with the first project – it will give you confidence and set you up for success with the next one!
I remember when I first purchased my Brother PR1000e 10 Needle machine, my daughter was very young so I had very limited time to play. I threaded it very quickly and put my first project on the machine. Well it sucked! I hadn’t threaded it properly but the worst thing that happened was that my first test project didn’t work out. I pulled out the manual and rethreaded the whole machine step by step and voila – the next project was perfect!
We’ve all been there so don’t be too hard on yourself!
Just Push the Go Button!
✔️Thread your machine
✔️Wind your bobbin and put it in
✔️Select a design from the machine
✔️Hoop up your fabric and stabilizer
✔️Put your hoop on the machine
✔️And press 🟢GO 🟢!
Use that as a checklist if you need to.
If you still can’t bring yourself to press the go button…
Let’s play “what’s the worst that can happen”:
- It doesn’t go – if your button light is still red make sure your presser foot is down (some machines you need to do this manually)
- The design doesn’t come out right – that’s totally fine, this is just a test design. If it doesn’t work you can problem solve the issue and try again. This happens to all of us from time to time.
- Your tension is off and your bobbin thread is peeking through to the top of the embroidery. Again this is a test design so that’s totally ok! Adjusting the tension is not that daunting and it’s a completely fixable issue that we all deal with from time to time.
- You have some puckering on your fabric – this is a fixable issue
- You break a needle, we all break needles from time to time. It’s not the end of the world.
You Got This!
All of the best solutions in the world have come from those who have encountered a problem. Encountering issues help us problem solve and learn to refine what we do to get great results. If everything was super easy, we would get no satisfaction from doing it and it would be boring!
And if you encounter an issue you can’t solve and I haven’t covered here, pop over to the NZ Machine Embroidery Addicts Facebook group and ask for help! That’s what this community is all about!
Go for it, you’re not alone, you’ve got this!


 Mandy Chamberlin is an embroidery digitizer and sewing & embroidery enthusiast on a mission to spread the love for machine embroidery.
Mandy is the founder and “head embroidery addict” of the NZ Machine Embroidery Addicts community group. Alongside her role as Echidna’s New Zealand Manager, Mandy also runs her own businesses, Veronica and Me Designs, where she offers embroidery digitizing and embroidery services both within New Zealand and around the world.
You can find out more about Mandy and connect with her through her contact info at mandychamberlin.com.